8 ET Station Components that Need Regular Maintenance
by Bruce Smith | Updated: 09/23/2015 | Comments: 0
Blog Topics
Area / Application


Product Category


Corporate / News
Search the Blog
Subscribe to the Blog
Set up your preferences for receiving email notifications when new blog articles are posted that match your areas of interest.
Suggest an Article
Is there a topic you would like to learn more about? Let us know. Please be as specific as possible.

Like most machines, automated weather stations require regular maintenance to provide you with better performance and longer life expectancy. A weather station designed to calculate evapotranspiration (ET) for commercial agriculture and irrigation scheduling has a number of components that require maintenance and calibration. Based on general recommended intervals, this article highlights eight common components of your ET106 or ET107 evapotranspiration weather station that should be regularly maintained or calibrated.
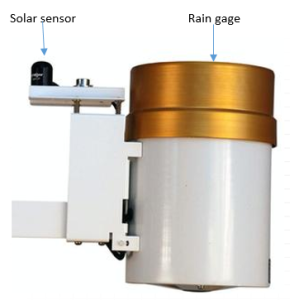
#1 - Solar Radiation Sensor
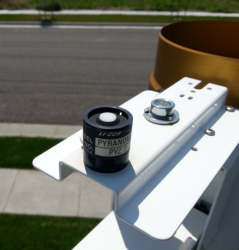
Once a month, inspect the solar radiation sensor (for example, the CS305-ETM). As needed, clean it using a soft, clean, damp cloth. If necessary, adjust the sensor to ensure it is level.
Once every three years, have the solar radiation sensor calibrated. For this calibration service, you will need to remove the sensor and send it to Campbell Scientific, which requires a Return Material Authorization (RMA). To obtain an RMA, follow the steps on the Repair and Calibration page.
|
Recommended for You: To check your solar radiation measurements and see if your sensor needs calibration, read the “How to Check the Accuracy of Your Solar Radiation Measurements” blog article. |
#2 - Rain Gage Sensor
Once every five years, have the rain gage sensor (for example, the TE525-ET) calibrated. You will need to remove the sensor and return it to Campbell Scientific for calibration. To acquire the necessary Return Material Authorization (RMA), follow the steps on the Repair and Calibration page.
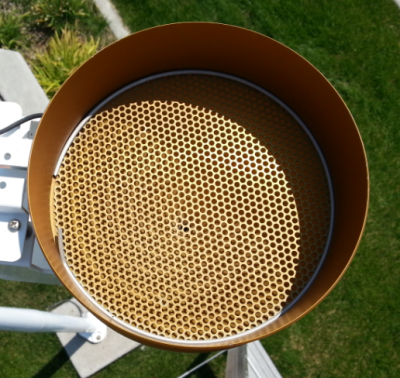
#3 - Rain Gage Funnel
 |
|
Once a week, inspect the rain gage funnel and clean it as needed. To clean the funnel, follow these steps:
|
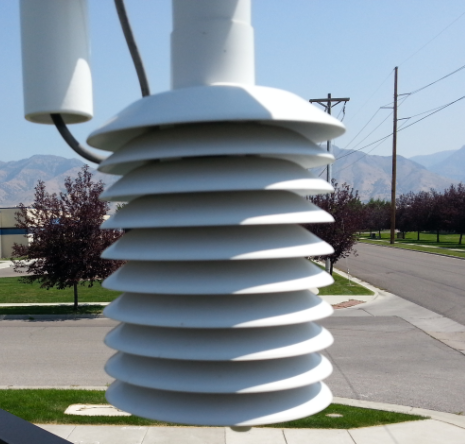
#4 - Air Temperature and Relative Humidity (RH) Shield
Once every three months, clean the temperature/RH (radiation) shield using a soft, clean, damp cloth.
|
If the shield is very dirty, follow these steps:
|
 |
#5 - Relative Humidity (RH) Chip
An ET station may use an HMP50-ET, HMP60-ETS, or HMP60-ETR temperature/RH probe. RH readings tend to drift up over time, possibly giving readings greater than 100%. All of these probes contain a pn 9598 replacement RH chip that should be replaced every three years, or more often as needed. If you ever have a reading greater than 100%, you should replace the chip. You can replace the chip following these steps:
- Remove the two screws that hold the shield to the bottom of the crossarm, and gently lower the assembly. Set the screws aside.
- Gently pull the temperature/RH sensor out from inside the shield. Set the shield aside.
- On the sensor, thread off the “Protective Cap and Filter,” as labeled in the diagram.
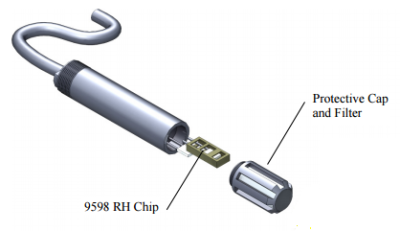
- The RH chip is plugged into the sensor. Remove it by pulling on it. Set the old chip aside.
-
Plug the new chip into the sensor.
Caution: Do not touch the shiny metal part of the new RH chip with your fingers, as this will damage the chip and result in inaccurate RH measurements. Only touch the chip’s plastic housing during replacement.
- Thread the “Protective Cap and Filter” onto the sensor.
- Place the temperature/RH sensor inside the shield.
- Replace and tighten the two screws that hold the shield to the bottom of the crossarm.
#6 - Wind Sensor
An ET station may use one of two different types of wind sensors. Both sensor types are covered in this section.
Models 034A-ET and 034B-ET
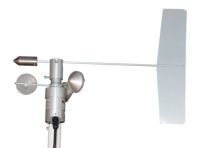
The frequency with which a 034A-ET or 034B-ET sensor needs to be maintained depends upon the environment in which your ET station is located.
- For a windy, dusty environment, the sensor requires maintenance once every six months.
- For an environment with a moderate amount of wind, sensor maintenance is required once a year.
- For an environment with minimal wind, you may only need to perform sensor maintenance once every two years.
Because maintenance of this sensor often requires replacement of the anemometer bearings and reed switch, Campbell Scientific recommends returning the sensor to the company’s Service Department. For repair and maintenance information, see our Repair and Calibration page.
WINDSONIC1-ETM (ET107 wind sensor option)
|
|
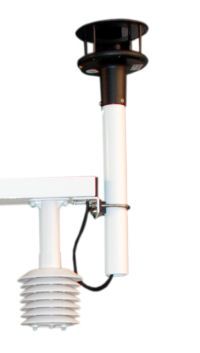 |
The WINDSONIC1-ETM requires very little maintenance. Once every six months, clean the sensor with a clean, soft, damp cloth. |
|
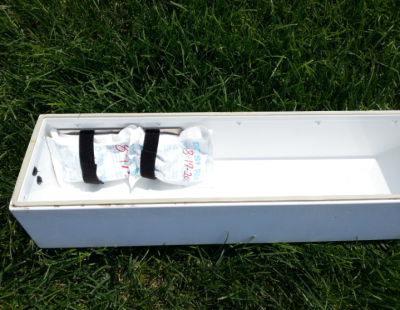
#7 - Desiccant Packs
Desiccant packs are typically installed in the enclosure lid of an ET106 or ET107 station, and they should be replaced about once every six months.
Two bags of pn 4905 desiccant are used at a time. A 20-pack desiccant option (with 10 packages of two bags each) is also available (pn 6714).
|
|
|
|
|
|
Tip: If you use a permanent marker to write the date onto the new desiccant packs when you install them, you’ll have a visual reminder as to when they were last replaced. |
|
#8 - Enclosure Seal
Once every five years, have the seal on the enclosure replaced. You will need to remove the enclosure assembly and return it to Campbell Scientific for refurbishing and calibration. To acquire the necessary Return Material Authorization (RMA), follow the steps on the Repair and Calibration page.
Conclusion
By providing regular maintenance care for the components of your ET106 or ET107 station, you can benefit from years of accurate evapotranspiration rate calculations. These calculations, in turn, can help you plan and follow an irrigation schedule that provides sufficient water while preventing overwatering.
|
Recommended for You: For more ET106 maintenance information, see the “ET106 Weather Station Instruction Manual.” For more ET107 maintenance information, see the “ET107 Weather Station Instruction Manual.” |
If you have any comments or questions, feel free to post them below.


About the Author
 Bruce Smith is a Technical Support Specialist at Campbell Scientific, Inc. He provides technical support for many Campbell Scientific products and specializes in supporting weather stations used in the commercial irrigation industry. Bruce’s background is in building maintenance. Away from work, he enjoys spending time with his family and dogs, being outdoors, and tinkering with cars.
Comments
Please log in or register to comment.